接受新的事物是不容易的,这意味要面临诸多陌生和不习惯,但xmake太简单易用了,从此cmake是路人。
安装
On linux:
curl -fsSL https://xmake.io/shget.text | bash |
On Windows:
Invoke-Expression (Invoke-Webrequest 'https://xmake.io/psget.text' -UseBasicParsing).Content |
或者直接使用包管理器安装。
如Archlinux:
sudo pacman -Sy xmake |
使用
创建项目
cpp xmake create -P ./hello |
此时目录为
hello |
xmake.lua的内容为:
add_rules("mode.debug", "mode.release") -- 添加debug和release模式 |
在此基础上可以添加更多如头文件和链接库。
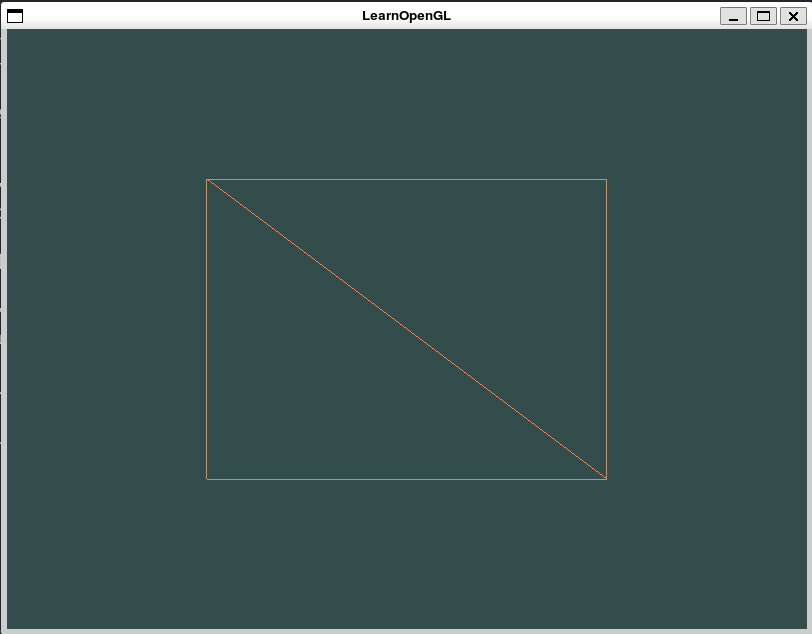
OpenGL-demo
环境为WSL-Archlinux。
安装glfw:
sudo pacman -S glfw-x11 |
下载glad放到项目路径中:
. |
main.cpp代码在这里。
xmake.lua的内容为:
add_rules("mode.debug", "mode.release") |
编译:
xmake |
运行:
./build/linux/x86_64/release/test-xmake |

功能
生成compile_commands.json
xmake project -k compile_commands |
如果有多个编译器,最好先设置好语法检查的编译器再生成:
xmake f --toolchain=clang |
使用mingw编译器
xmake f -p mingw --sdk=/path/to/mingw/ |
发现mingw编译速度很慢,换成msvc:
xmake f --toolchain=msvc |
切换编译模式到debug/release
xmake f -m debug |
f意为config,m意为mode
添加远程库
如glm,先编辑xmake.lua:
add_rules("mode.debug", "mode.release") |
然后生成compile_commands以让编译器智能补全:
xmake #构建时会自动从远程仓库拉取 |
需要注意的是,添加依赖库的方式很多,常用是:
①使用xmake的包管理器,可以使用vcpkg或conon的包,也可以使用xmake自己的包,添加的方式是:
add_requires("glfw") // 添加依赖 |
②从源码编译成依赖库:
如源码路径:
└─spdlog |
在spdlog文件下创建xmake.lua作为项目的子模块:
target("spdlog") |
然后再自己项目中的xmake.lua中包含并添加依赖:
target("myPrj") |
Qt项目
创建:
xmake create -t qt.console test |
配置qt版本
xmake f --qt=~/Qt/Qt5.9.1 |
使用xmake生成Visual Studio项目
xmake project -k vsxmake |
要注意,add_includedirs中的头文件并不会在VS中显示,需要额外使用add_headerfiles将头文件安装到工程中。
下载xmake包使用内置镜像加速(github)
xmake g --proxy_pac=github_mirror.lua |
不用自己编写 pac.lua,就可以直接使用它来加速 github 源的下载。
更多内置镜像可以通过
xmake g --help查看--proxy_pac=下列表。
设置主题
xmake的全局配置在家目录下的.xmake文件夹中,打开其中的xmake.conf可以看到:
{ |
其中的proxy_pac即是设置的代理,这里使用的是内置github加速,主题是默认。
可选的主题有ninja、emoji、dark、light、powershell和plain.
可以直接修改conf文件或使用全局配置修改主题:
xmake g --theme=plain |
xmake.conf和运行前先构建
xmake可以设置策略,使得每次使用xmake r运行前先构建,再运行。
xmake f --policies=run.autobuild |
有时候会出现bug,设置完自动构建,xmake会把构建模式设置成release,可以同时设置:
xmake f -m debug --policies=run.autobuild |
或者打开./xmake/windows/x64/xmake.conf手动修改(不推荐):
{ |
导入CMake本地包
使用msdf-atlas-gen包时,发现xmake官方repo中没有,因此从github上下载并以cmake的构建方式导入xmake中。
git clone --recursive https://github.com/Chlumsky/msdf-atlas-gen.git |
然后将其放到项目文件夹中,在xmake.lua中添加:
package("msdf-atlas-gen") |
然后就可以在项目中添加此包:
add_packages("msdf-atlas-gen") |
运行xmake,会提示安装msdf-atlas-gen,安装即可使用。安装时的依赖会根据包的作者配置的cmake进行查找和安装,此包使用vcpkg安装依赖,在linux或windows环境下要先安装vcpkg。
但目前发现有一些bug,比如当一个包中依赖多个子项目时,xmake可能会找不到头文件,需要手动将包的头文件添加到xmake.lua中:
add_includedirs("./vendor/msdf-atlas-gen/msdf-atlas-gen", |
<<<<<<< HEAD
在window上链接预编译动态库
add_linkdirs("path/to/lib") |
这样即已经设置了寻找库文件的路径,只需添加.lib文件即可:
add_links("your_lib") |
这样运行时会自动搜索将库文件的路径里的dll文件。
=======
设置c++标准
set_languages("c99", "cxx11") |
可同时设置c和c++的标准。
设置代理
xmake g --proxy="socks5://127.0.0.1:7890" |
- 本文标题:使用xmake构建c++项目
- 创建时间:2023-06-23 17:38:00
- 本文链接:2023/06/23/note/Programming/tools/xmake/
- 版权声明:本博客所有文章除特别声明外,均采用 BY-NC-SA 许可协议。转载请注明出处!

